
Crafting a WordPress website from scratch can feel like wrestling with a lion, even for the experienced web builders!
It’s like standing in front of a blank canvas with a palette full of colors, but no clear idea of where to begin. You need to decide on a layout, select appropriate themes and plugins, choose color schemes, select typography, and craft user interfaces – all while ensuring the site remains responsive and user-friendly. If you don’t have a background in design or development, this process can be daunting and time-consuming, often leading to your own frustration and delays.
The struggle of transforming a vision into a functional, visually appealing WordPress site is a real hurdle faced by many.
That’s why many block builder plugins provide ready-to-use templates. They allow you to get your website up and running without dealing with complicated designs.
While starter templates can be a lifesaver, but there are times when they just don’t cut it. Like when you received a Figma design from your client and you need to turn it into a WordPress site. These templates can’t keep up with the unique designs and specific needs.
So, you end up spending far too much time adjusting things or starting from scratch again, which can be a real pain!
.
.
.
Enter The AI
Ever since ChatGPT burst onto the scene, AI has been a total game changer.
So, here’s a thought: What if you could snap a picture of a website layout or a Figma design, and AI could whip up a fully functional WordPress template from it? Sounds like something out of a sci-fi movie, right? But imagine the impact on web development!

We already know that AI can churn out code, but the real question is whether it can help us build a WordPress site right from scratch.
Imagine the possibilities if AI could actually pull this off.
It would revolutionize the game, especially for those unique designs where pre-made templates just aren’t enough.
That said, the market is flooded with tools that claim to be “AI-powered,” promising to generate a complete WordPress site in mere minutes. However, when you actually try them, you realize this so-called “AI-powered” magic is nothing more than some fancy if-else logic.
Really, they’re just tweaking standard templates with a little sprinkle of “AI.”
This won’t cut it if you’re looking to create a site with a truly custom design. Ultimately, you find yourself back at square one, manually adjusting the layout. Sometimes, you can’t help but wonder if starting from scratch would have been faster.
So here’s the real question: Can AI truly help us build a WordPress site from the ground up? I mean the kind of AI that’s more than just a set of if-else statements and can handle whatever custom design we throw at it.
Well…
.
.
.
Here Comes Claude 3
With Claude 3 on the scene, what once seemed like a distant dream is now very much a reality.
Let me walk you through how it works:
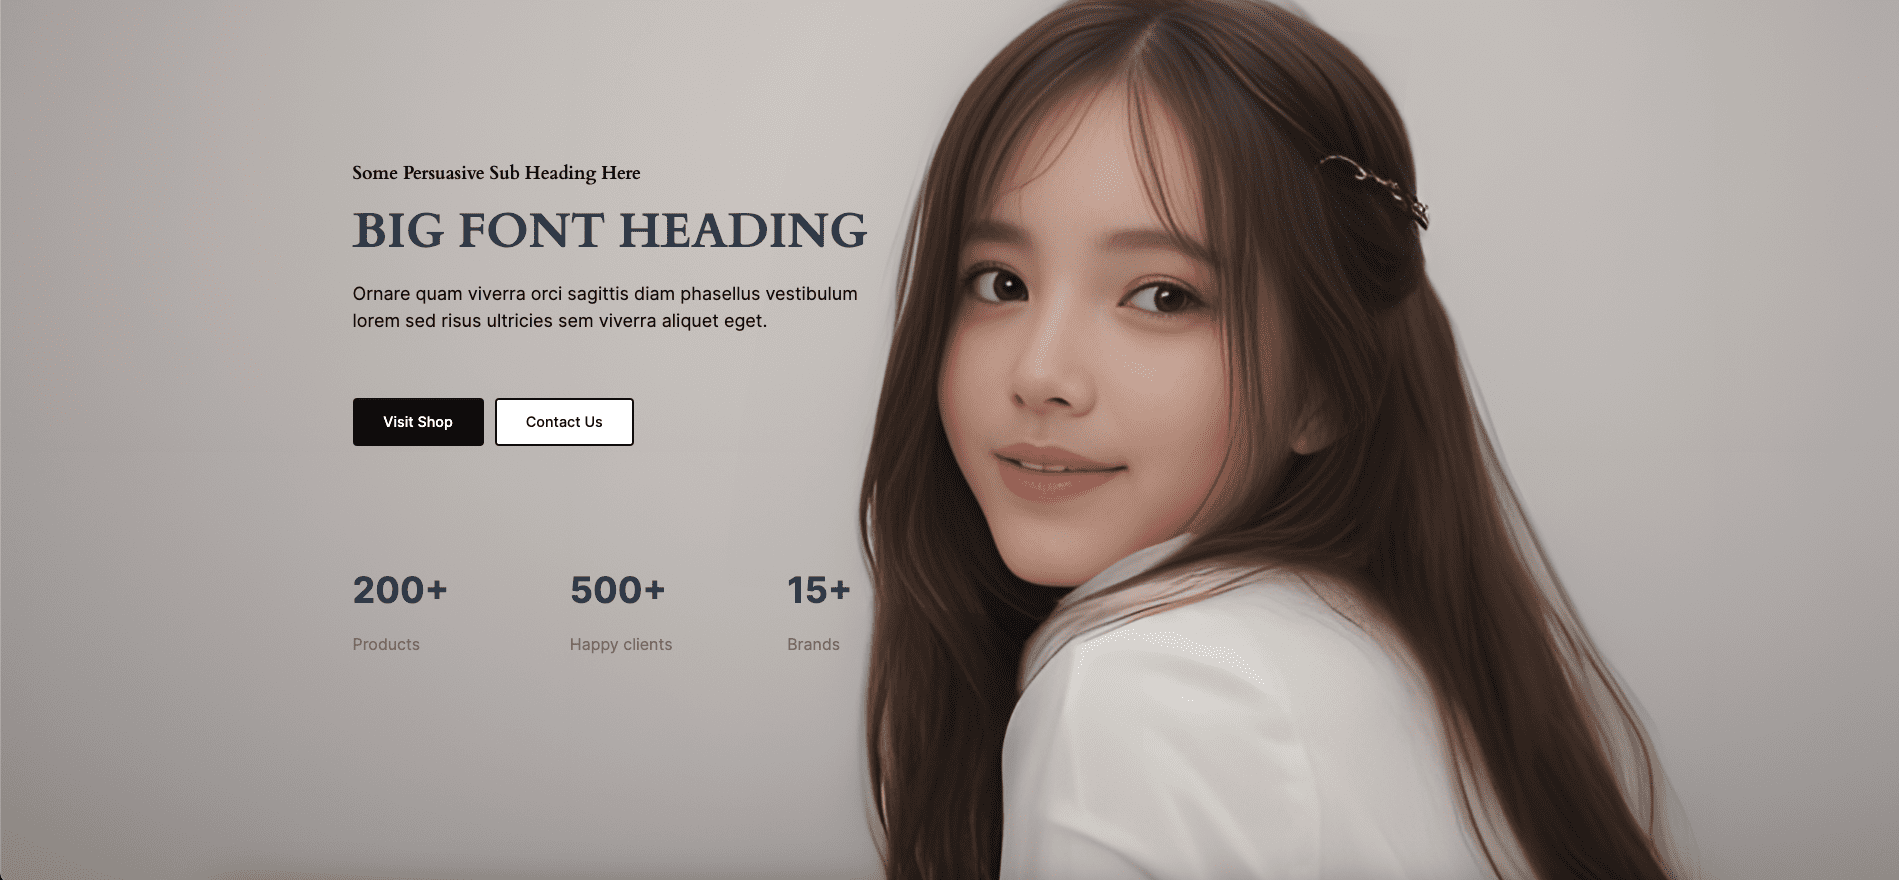
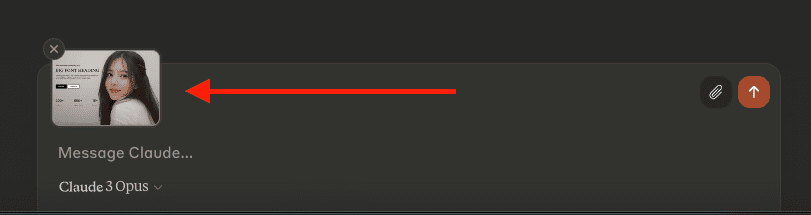
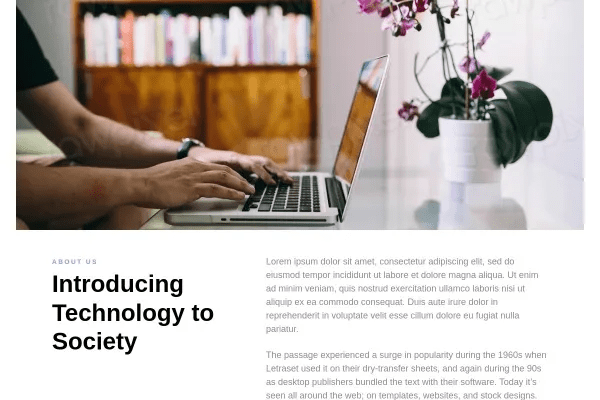
First, I pick the image layout I want to recreate in WordPress. This could be anything from a Figma design to a screenshot of an existing website layout you’re aiming to clone.
Next, I feed the AI some training data that showcase examples of how to build block patterns in WordPress.
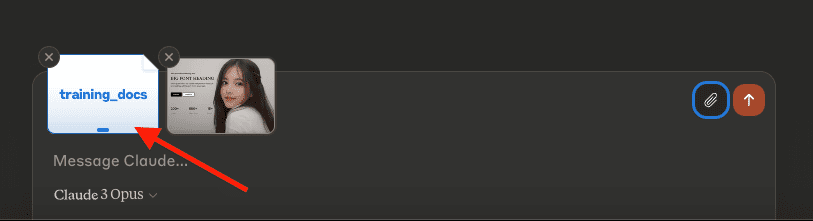
(Note: I’ll explain how to craft your own training docs later on.)
Then, I instruct the AI to use the image layout as a reference and ask it for the codes needed to create a similar layout.
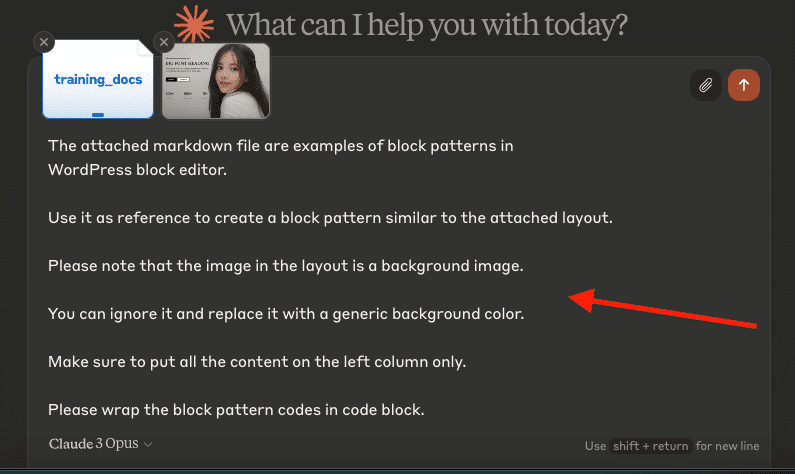
The Prompt:
The attached markdown file are examples of block patterns in WordPress block editor.

Use it as reference to create a block pattern similar to the attached layout.

Please note that the image in the layout is a background image.

You can ignore it and replace it with a generic background color.

Make sure to put all the content on the left column only.

Please wrap the block pattern codes in code block.
(Tip: It’s a good idea to describe the layout a bit so the AI knows exactly what to do and gives you precisely what you need.)
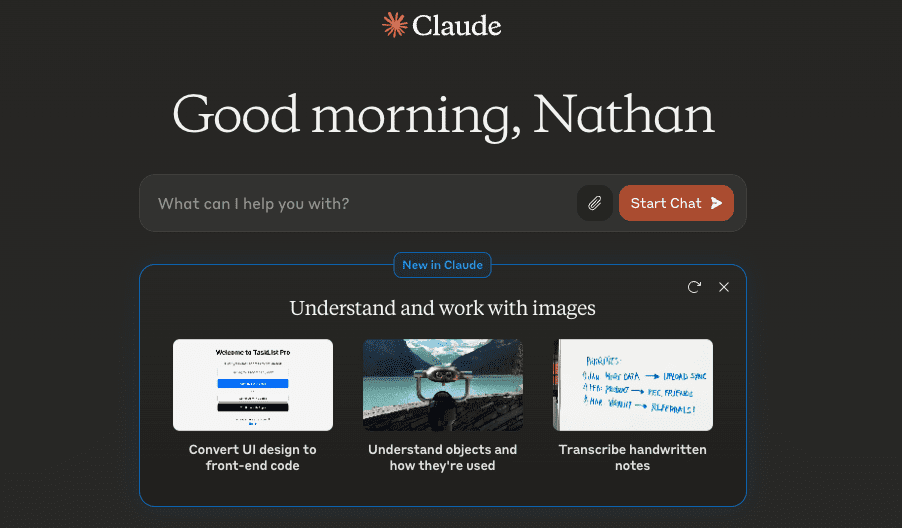
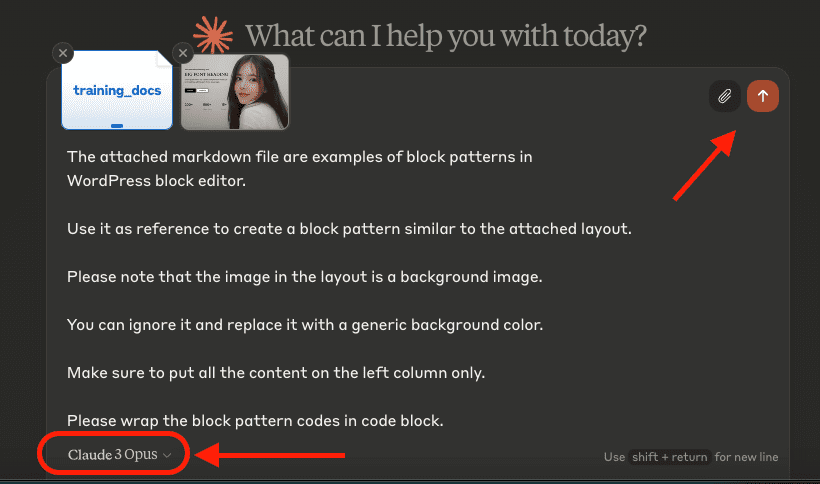
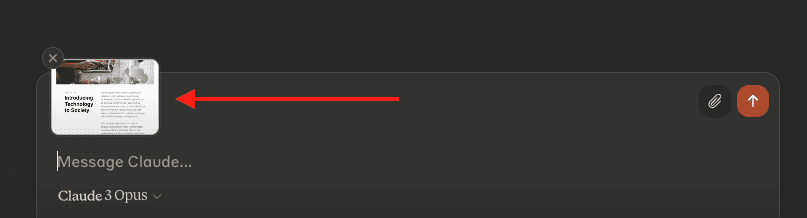
Make sure “Claude 3 Opus” is selected and hit the “Start Chat” button.
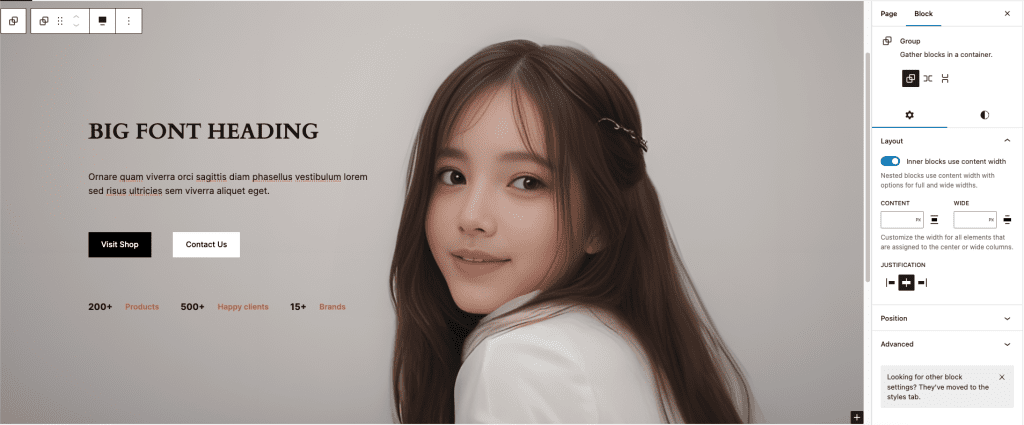
And voilà… just like that, the AI spits out codes that you can use to replicate the layout in WordPress.
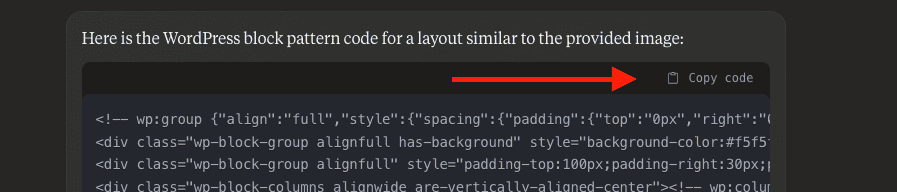
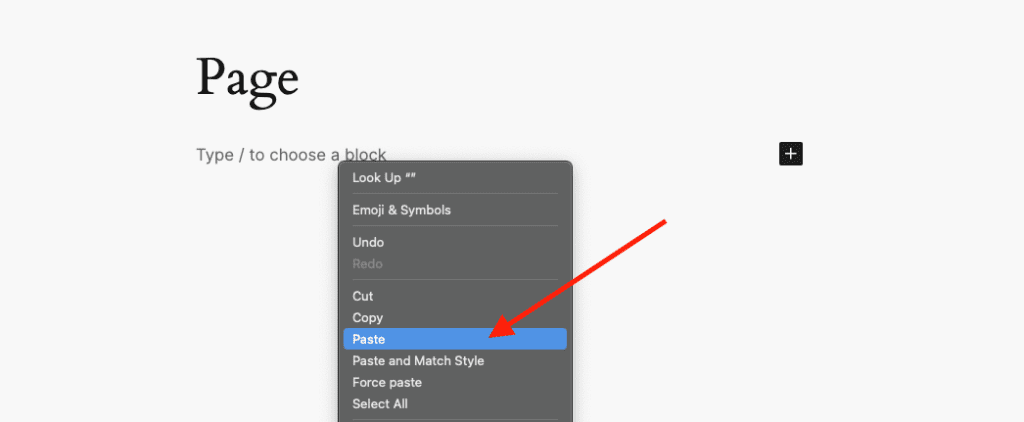
All that’s left to do is copy these codes and paste them into the block editor.
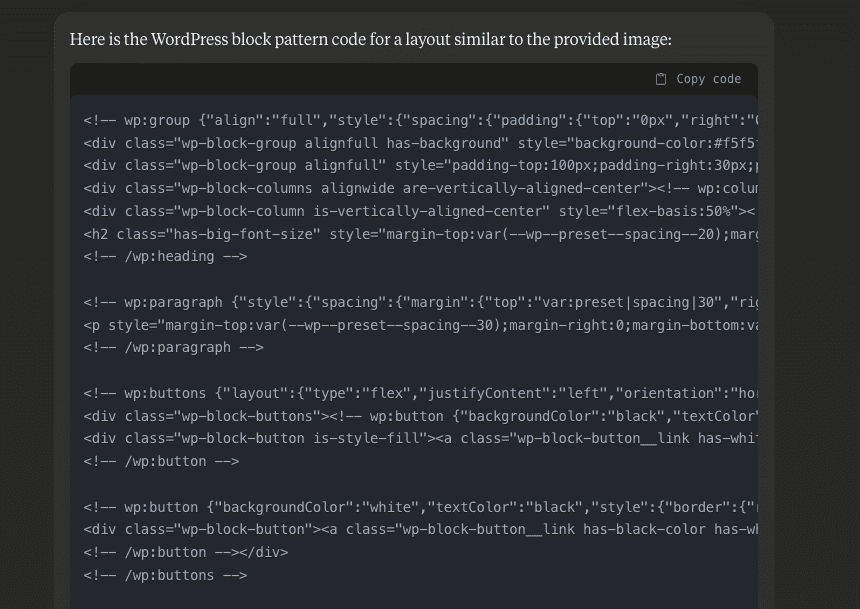
Here are the codes generated by Claude 3 Opus (feel free to try this on your own site):
<!-- wp:group {"align":"full","style":{"spacing":{"padding":{"top":"0px","right":"0px","bottom":"200px","left":"0px"},"blockGap":"16px"},"color":{"background":"#f5f5f5"}},"layout":{"type":"constrained"}} -->
<div class="wp-block-group alignfull has-background" style="background-color:#f5f5f5;padding-top:0px;padding-right:0px;padding-bottom:200px;padding-left:0px"><!-- wp:group {"align":"full","style":{"spacing":{"padding":{"top":"100px","right":"30px","bottom":"100px","left":"30px"}}},"layout":{"type":"constrained"}} -->
<div class="wp-block-group alignfull" style="padding-top:100px;padding-right:30px;padding-bottom:100px;padding-left:30px"><!-- wp:columns {"verticalAlignment":"center","align":"wide","style":{"spacing":{"blockGap":{"top":"var:preset|spacing|40","left":"var:preset|spacing|40"}}}} -->
<div class="wp-block-columns alignwide are-vertically-aligned-center"><!-- wp:column {"verticalAlignment":"center","width":"50%"} -->
<div class="wp-block-column is-vertically-aligned-center" style="flex-basis:50%"><!-- wp:heading {"style":{"typography":{"textTransform":"none","fontStyle":"normal","fontWeight":"700","lineHeight":"1.5"},"spacing":{"margin":{"top":"var:preset|spacing|20","right":"0","bottom":"0","left":"0"}}},"fontSize":"big-font"} -->
<h2 class="has-big-font-size" style="margin-top:var(--wp--preset--spacing--20);margin-right:0;margin-bottom:0;margin-left:0;font-style:normal;font-weight:700;line-height:1.5;text-transform:none">BIG FONT HEADING</h2>
<!-- /wp:heading -->
<!-- wp:paragraph {"style":{"spacing":{"margin":{"top":"var:preset|spacing|30","right":"0","bottom":"var:preset|spacing|40","left":"0"}}}} -->
<p style="margin-top:var(--wp--preset--spacing--30);margin-right:0;margin-bottom:var(--wp--preset--spacing--40);margin-left:0">Ornare quam viverra orci sagittis diam phasellus vestibulum lorem sed risus ultricies sem viverra aliquet eget.</p>
<!-- /wp:paragraph -->
<!-- wp:buttons {"layout":{"type":"flex","justifyContent":"left","orientation":"horizontal"},"style":{"spacing":{"blockGap":"var:preset|spacing|30"}}} -->
<div class="wp-block-buttons"><!-- wp:button {"backgroundColor":"black","textColor":"white","style":{"border":{"radius":"0px"},"spacing":{"padding":{"top":"12px","right":"24px","bottom":"12px","left":"24px"}}},"className":"is-style-fill"} -->
<div class="wp-block-button is-style-fill"><a class="wp-block-button__link has-white-color has-black-background-color has-text-color has-background wp-element-button" style="border-radius:0px;padding-top:12px;padding-right:24px;padding-bottom:12px;padding-left:24px">Visit Shop</a></div>
<!-- /wp:button -->
<!-- wp:button {"backgroundColor":"white","textColor":"black","style":{"border":{"radius":"0px"},"spacing":{"padding":{"top":"12px","right":"24px","bottom":"12px","left":"24px"}}}} -->
<div class="wp-block-button"><a class="wp-block-button__link has-black-color has-white-background-color has-text-color has-background wp-element-button" style="border-radius:0px;padding-top:12px;padding-right:24px;padding-bottom:12px;padding-left:24px">Contact Us</a></div>
<!-- /wp:button --></div>
<!-- /wp:buttons -->
<!-- wp:group {"style":{"spacing":{"padding":{"top":"60px","right":"0","bottom":"0px","left":"0"},"blockGap":"var:preset|spacing|30"}},"layout":{"type":"flex","flexWrap":"nowrap"}} -->
<div class="wp-block-group" style="padding-top:60px;padding-right:0;padding-bottom:0px;padding-left:0"><!-- wp:group {"style":{"spacing":{"blockGap":"var:preset|spacing|20"}},"layout":{"type":"flex","flexWrap":"nowrap"}} -->
<div class="wp-block-group"><!-- wp:paragraph {"style":{"typography":{"fontStyle":"normal","fontWeight":"700"}},"fontSize":"big"} -->
<p class="has-big-font-size" style="font-style:normal;font-weight:700">200+</p>
<!-- /wp:paragraph -->
<!-- wp:paragraph {"style":{"typography":{"fontStyle":"normal","fontWeight":"600"}},"textColor":"cyan-bluish-gray","fontSize":"small"} -->
<p class="has-cyan-bluish-gray-color has-text-color has-small-font-size" style="font-style:normal;font-weight:600">Products</p>
<!-- /wp:paragraph --></div>
<!-- /wp:group -->
<!-- wp:group {"style":{"spacing":{"blockGap":"var:preset|spacing|20"}},"layout":{"type":"flex","flexWrap":"nowrap"}} -->
<div class="wp-block-group"><!-- wp:paragraph {"style":{"typography":{"fontStyle":"normal","fontWeight":"700"}},"fontSize":"big"} -->
<p class="has-big-font-size" style="font-style:normal;font-weight:700">500+</p>
<!-- /wp:paragraph -->
<!-- wp:paragraph {"style":{"typography":{"fontStyle":"normal","fontWeight":"600"}},"textColor":"cyan-bluish-gray","fontSize":"small"} -->
<p class="has-cyan-bluish-gray-color has-text-color has-small-font-size" style="font-style:normal;font-weight:600">Happy clients</p>
<!-- /wp:paragraph --></div>
<!-- /wp:group -->
<!-- wp:group {"style":{"spacing":{"blockGap":"var:preset|spacing|20"}},"layout":{"type":"flex","flexWrap":"nowrap"}} -->
<div class="wp-block-group"><!-- wp:paragraph {"style":{"typography":{"fontStyle":"normal","fontWeight":"700"}},"fontSize":"big"} -->
<p class="has-big-font-size" style="font-style:normal;font-weight:700">15+</p>
<!-- /wp:paragraph -->
<!-- wp:paragraph {"style":{"typography":{"fontStyle":"normal","fontWeight":"600"}},"textColor":"cyan-bluish-gray","fontSize":"small"} -->
<p class="has-cyan-bluish-gray-color has-text-color has-small-font-size" style="font-style:normal;font-weight:600">Brands</p>
<!-- /wp:paragraph --></div>
<!-- /wp:group --></div>
<!-- /wp:group --></div>
<!-- /wp:column -->
<!-- wp:column {"verticalAlignment":"center","width":"50%"} -->
<div class="wp-block-column is-vertically-aligned-center" style="flex-basis:50%"></div>
<!-- /wp:column --></div>
<!-- /wp:columns --></div>
<!-- /wp:group --></div>
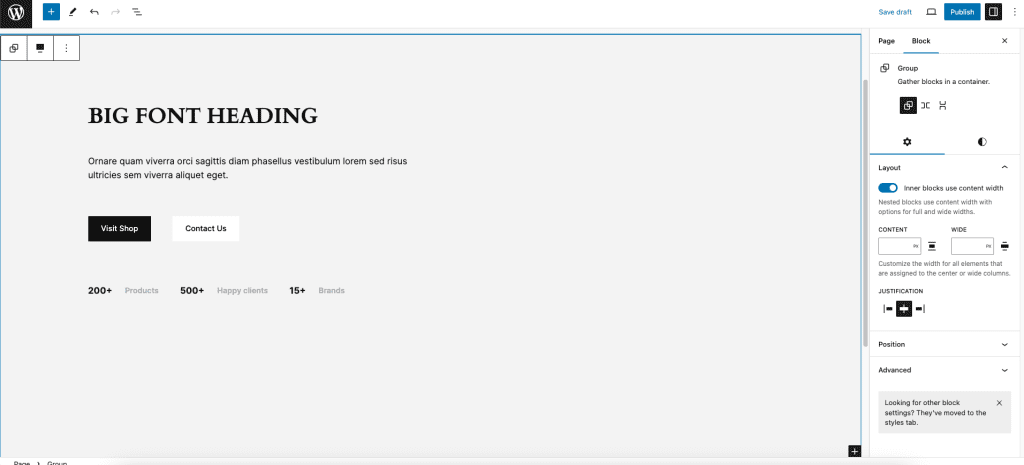
<!-- /wp:group -->A heads up: you’ll notice there are no background images. That’s because I specifically told the AI to skip over the background image part. AI isn’t quite smart enough to automatically create background images just yet, and you definitely don’t want to risk it hallucinating and throwing in a broken image link.
It’s safer to have AI ignore the images entirely or just insert a placeholder.
So, now we just need to upload the background image, do a little tweak here and there, and we’re all set!
.
.
.
Now, you might think that was just a lucky shot.
Let’s test it out again.
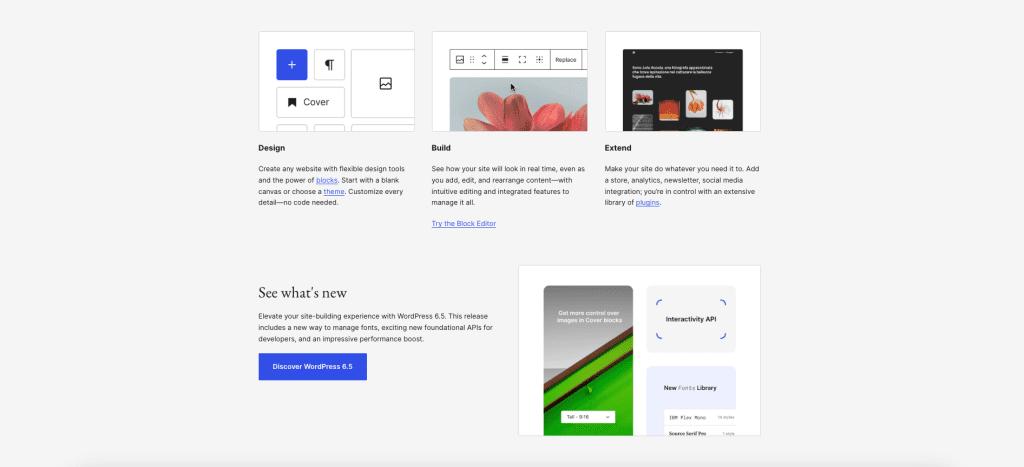
This time, I’m taking a layout straight from the WordPress.org site to see if we can replicate it.
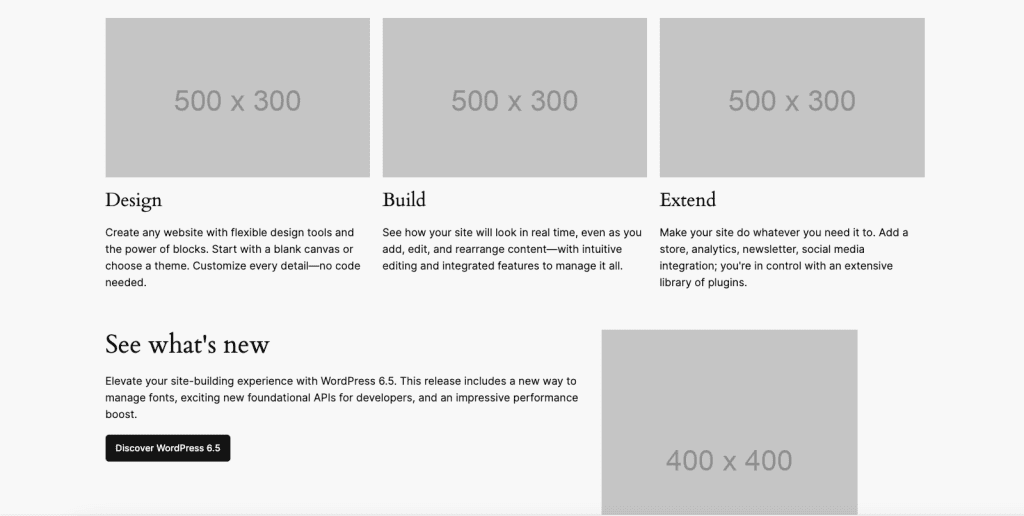
Here’s the screenshot:
Let’s dive in and repeat the process.
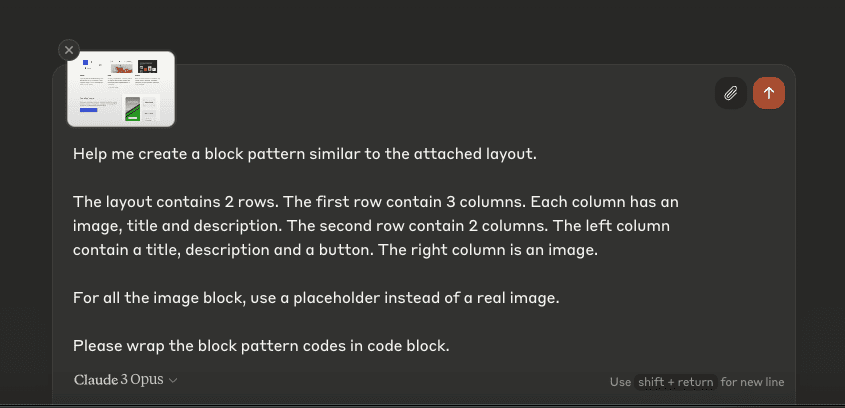
First off, upload the screenshot of the layout. Next, load up the training documents. After that, give the AI a basic rundown of the layout so it can really hone in on what we’re trying to mimic.
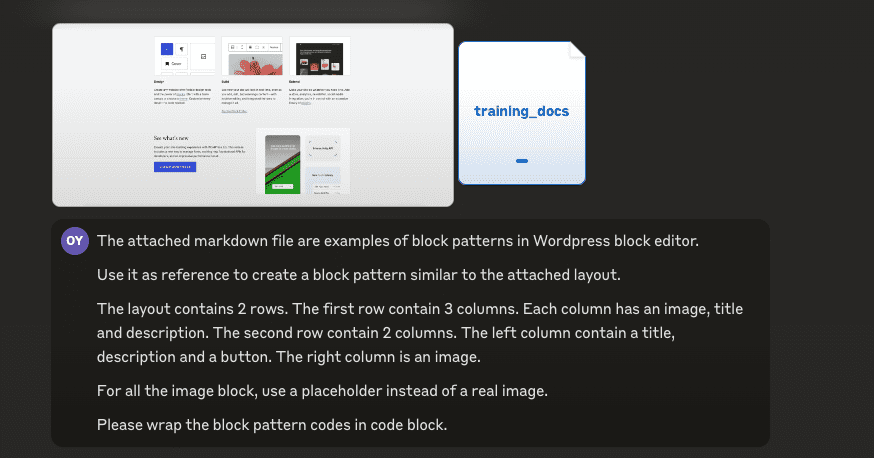
The attached markdown file contains examples of block patterns in the WordPress block editor.

Use it as a reference to create a block pattern similar to the attached layout.

The layout contains 2 rows. The first row contains 3 columns. Each column has an image, title, and description. The second row contains 2 columns. The left column contains a title, description, and a button. The right column is an image.

For all the image blocks, use a placeholder instead of a real image.

Please wrap the block pattern codes in a code block.
The idea here is to feed the AI enough details so it can produce something that’s even closer to the layout we want to clone.
Let’s see how close we can get this time!
Hit ‘Start’ and let the AI do its thing.
Just a few moments later, the AI churns out the new code.
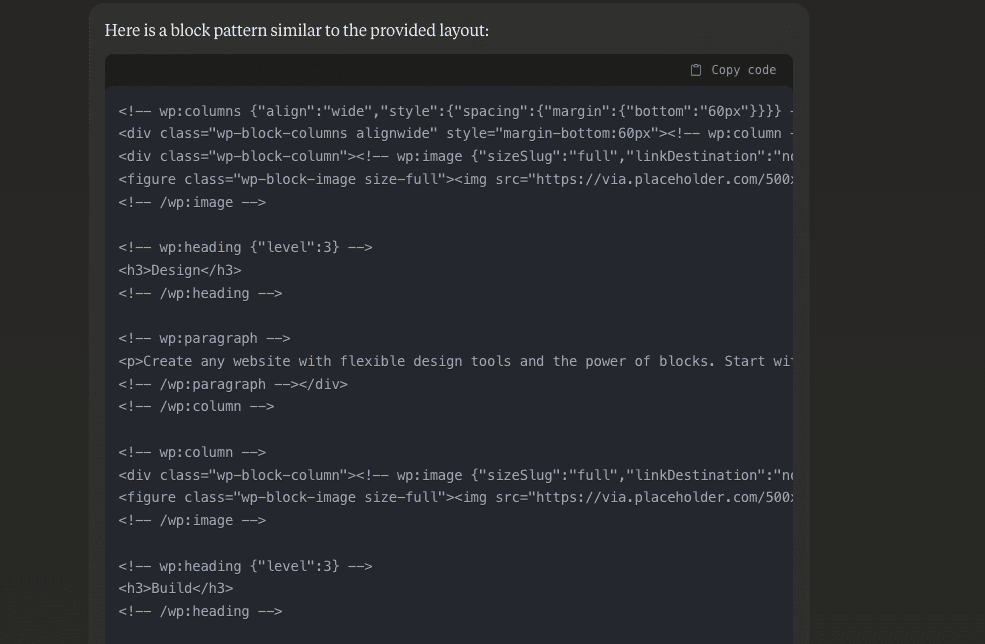
Test this out on your own site:
<!-- wp:columns {"align":"wide","style":{"spacing":{"margin":{"bottom":"60px"}}}} -->
<div class="wp-block-columns alignwide" style="margin-bottom:60px"><!-- wp:column -->
<div class="wp-block-column"><!-- wp:image {"sizeSlug":"full","linkDestination":"none"} -->
<figure class="wp-block-image size-full"><img src="https://via.placeholder.com/500x300" alt=""/></figure>
<!-- /wp:image -->

<!-- wp:heading {"level":3} -->
<h3>Design</h3>
<!-- /wp:heading -->

<!-- wp:paragraph -->
<p>Create any website with flexible design tools and the power of blocks. Start with a blank canvas or choose a theme. Customize every detail—no code needed.</p>
<!-- /wp:paragraph --></div>
<!-- /wp:column -->

<!-- wp:column -->
<div class="wp-block-column"><!-- wp:image {"sizeSlug":"full","linkDestination":"none"} -->
<figure class="wp-block-image size-full"><img src="https://via.placeholder.com/500x300" alt=""/></figure>
<!-- /wp:image -->

<!-- wp:heading {"level":3} -->
<h3>Build</h3>
<!-- /wp:heading -->

<!-- wp:paragraph -->
<p>See how your site will look in real time, even as you add, edit, and rearrange content—with intuitive editing and integrated features to manage it all.</p>
<!-- /wp:paragraph --></div>
<!-- /wp:column -->

<!-- wp:column -->
<div class="wp-block-column"><!-- wp:image {"sizeSlug":"full","linkDestination":"none"} -->
<figure class="wp-block-image size-full"><img src="https://via.placeholder.com/500x300" alt=""/></figure>
<!-- /wp:image -->

<!-- wp:heading {"level":3} -->
<h3>Extend</h3>
<!-- /wp:heading -->

<!-- wp:paragraph -->
<p>Make your site do whatever you need it to. Add a store, analytics, newsletter, social media integration; you're in control with an extensive library of plugins.</p>
<!-- /wp:paragraph --></div>
<!-- /wp:column --></div>
<!-- /wp:columns -->

<!-- wp:columns {"align":"wide"} -->
<div class="wp-block-columns alignwide"><!-- wp:column {"width":"60%"} -->
<div class="wp-block-column" style="flex-basis:60%"><!-- wp:heading -->
<h2>See what's new</h2>
<!-- /wp:heading -->

<!-- wp:paragraph -->
<p>Elevate your site-building experience with WordPress 6.5. This release includes a new way to manage fonts, exciting new foundational APIs for developers, and an impressive performance boost.</p>
<!-- /wp:paragraph -->

<!-- wp:button -->
<div class="wp-block-button"><a class="wp-block-button__link wp-element-button">Discover WordPress 6.5</a></div>
<!-- /wp:button --></div>
<!-- /wp:column -->

<!-- wp:column {"width":"40%"} -->
<div class="wp-block-column" style="flex-basis:40%"><!-- wp:image {"sizeSlug":"full","linkDestination":"none"} -->
<figure class="wp-block-image size-full"><img src="https://via.placeholder.com/400x400" alt=""/></figure>
<!-- /wp:image --></div>
<!-- /wp:column --></div>
<!-- /wp:columns -->
Now, let’s pop these codes into the WordPress block editor and see how they stack up against our original screenshot
And here’s the result:
Pretty impressive, right?
It looks almost identical to the layout from the WordPress.org site. This really showcases the power of Claude 3 Opus—not just a one-hit wonder but a reliable tool for replicating designs. This method isn’t just a fluke; it’s a new frontier for web design, where you can bring any visual inspiration to life in your WordPress projects.
The potential here is huge, especially for designers looking to speed up their workflow and maintain high quality.
.
.
.
How does it work? More importantly, why does it work so well?
You might be wondering, what’s the deal with those training docs? Are they really the key to unlocking this AI magic?
Well, let’s put it to the test!
What if we tried the same prompt as before, but this time, we left out the training docs? Would the AI still be able to generate those sweet, sweet block pattern codes?
Let’s find out!
Here’s the prompt, without the training docs:
And the result?
Well, instead of block pattern codes, the AI spits out some generic HTML:

Not exactly what we were hoping for, right?
So, what gives?
It turns out, those training docs are the secret sauce, the special ingredient that makes this whole thing possible!

Inside these training docs, you’ll find step-by-step examples of how block patterns are created, along with their purpose and the specific codes that make them tick.
It’s like a crash course for the AI, teaching it the ins and outs of block pattern creation. The AI studies these examples, using them as a reference to generate any layout you throw its way. It’s like giving the AI a cheat sheet, enabling it to ace the test every single time!

It’s kind of like training a superhero sidekick. You teach ’em the ropes, and boom! They’re all set to help you save the day (or in this case, build awesome WordPress sites).
So, there you have it!
The training docs aren’t just some boring old files; they’re the key to unlocking the full potential of AI-powered web design. By providing the AI with a solid foundation of examples and knowledge, you’re essentially creating your own custom AI assistant, ready to tackle any layout challenge you throw its way.
Pretty mind-blowing, right?
.
.
.
How I Created My Training Docs
You can download the training docs I used right here: https://go.nathanonn.com/bwam-training-docs
Go ahead and take a peek inside. You’ll find 19 different block patterns, each one a shining example of what’s possible with WordPress. And the best part? They’re all courtesy of the WordPress Block Pattern Directory.
So, why did I choose these specific 19 block patterns? It’s simple: they cover pretty much every common layout you’ll find on a website. Whether you’re looking to create a hero section, a pricing table, or a testimonial showcase, these patterns have got you covered.
(Huge shoutout to Cozy Themes for sharing these gems with the world!)
Now, let’s dive into what makes these training docs so special.
For each block pattern, you’ll find:
- The purpose of the design (What’s it for?)
- A detailed description of the design (What’s it got?)
- Step-by-step instructions on how to create it (How do you make it?)
- The actual block codes (The secret recipe!)
By including all this info, we’re giving the AI everything it needs to learn how to write block codes like a pro.
It’s like sending the AI to block code bootcamp!
You might’ve noticed that there aren’t any images in the training docs.
There are a couple of reasons for that.
First off, you can’t actually attach images in a markdown file. But more importantly, they’re not really necessary. The purpose and description of each block pattern do a fantastic job of painting a picture for the AI, helping it “visualize” how the design should be used and what it should look like.
Plus, if we tried to include images, it would take up a ton of tokens for the AI to “read” them. We’d quickly exceed the context window limits, and nobody wants that!
(Fun fact: Claude 3 has a whopping 200k tokens of context windows, making it the perfect AI model for this kind of task.)
.
.
.
Crafting Your Own Training Docs
Now that you’ve seen the magic behind my training docs, I bet you’re itching to create your own. Don’t worry, it’s not as daunting as it might seem!
First things first, you’ll need to round up 15 to 20 block patterns that really float your boat. These could be design templates from a blocks plugin or straight from the WordPress Block Pattern Directory. The world’s your oyster!
For each block pattern, make sure you’ve got:
- A screenshot of the block pattern design (gotta have that visual!)
- The codes you can copy-paste into a block editor to recreate the design (the secret sauce!)
Once you’ve got your ducks in a row, it’s time to let the AI work its magic. We’ll use it to generate the purpose, description, and step-by-step instructions for each pattern.
Here’s how it’s done:
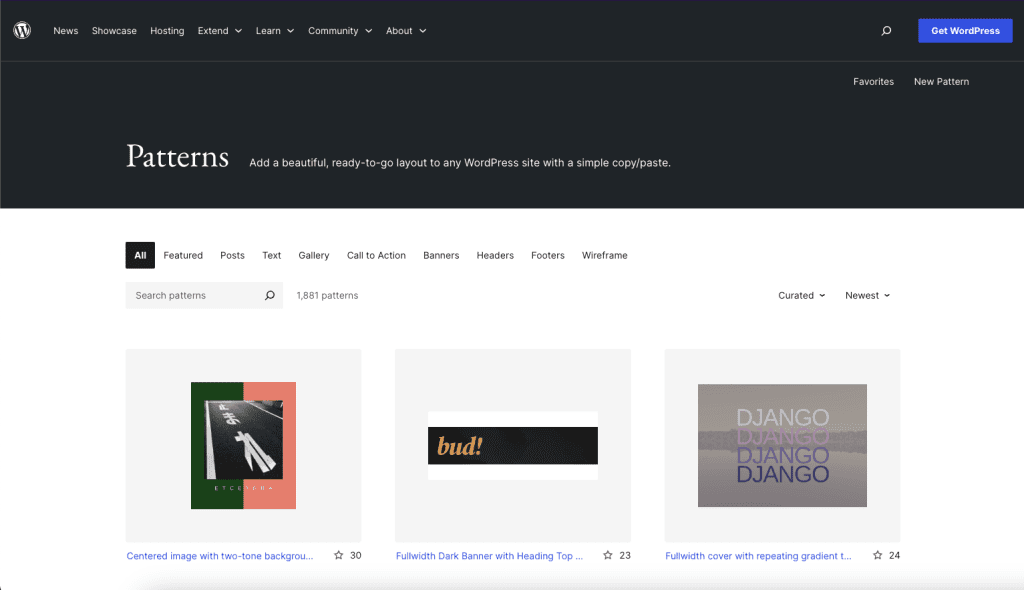
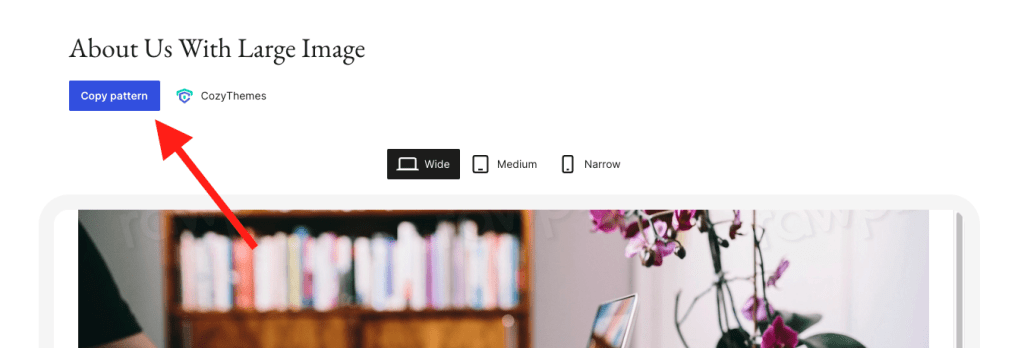
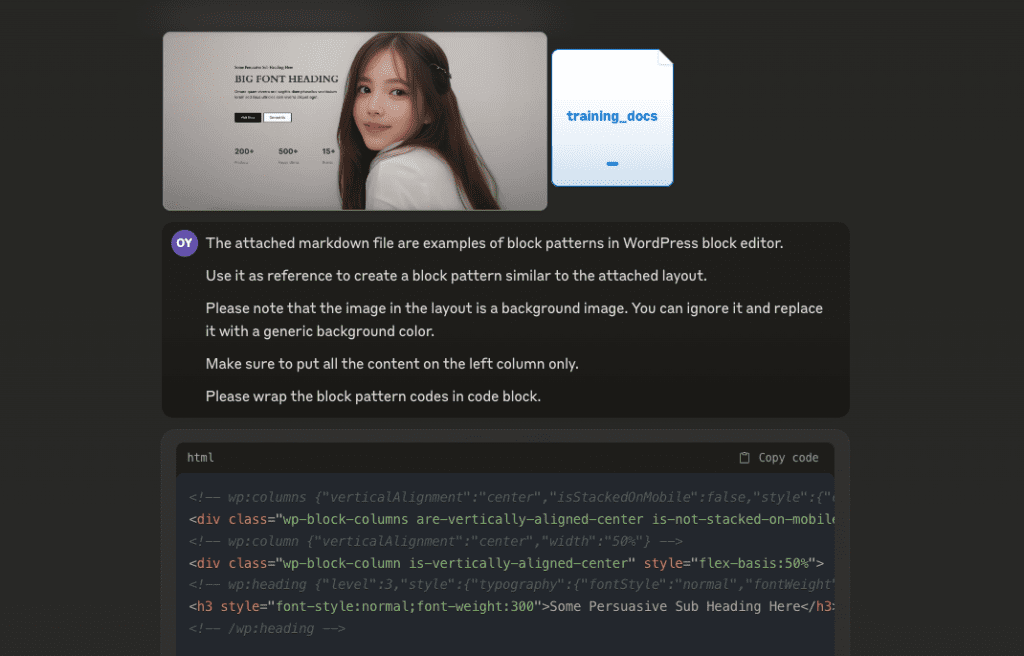
1. Say you want to include this snazzy block pattern from the directory in your training docs:
2. Upload the screenshot of the design into Claude (let the AI feast its eyes on it!)
3. Copy the block codes and paste ’em into the prompt box:

4. Drop this prompt into the box:
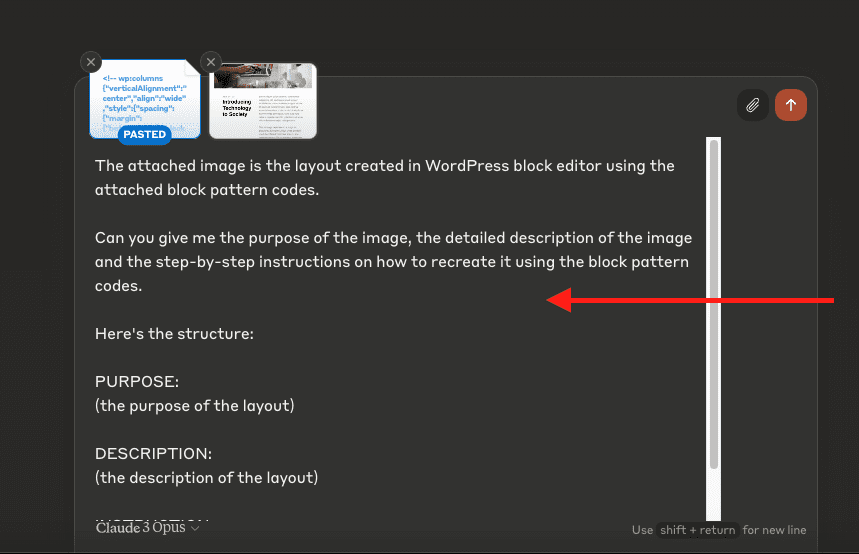
Feel free to copy the prompt here:
The attached image is the layout created in WordPress block editor using the attached block pattern codes.

Can you give me the purpose of the image, the detailed description of the image and the step-by-step instructions on how to recreate it using the block pattern codes.

Here's the structure:

PURPOSE:
(the purpose of the layout)

DESCRIPTION:
(the description of the layout)

INSTRUCTION:
(the step-by-step instructions to create the block pattern)
5. Make sure “Claude 3 Opus” is selected as the model, then smash that “Start Chat” button!
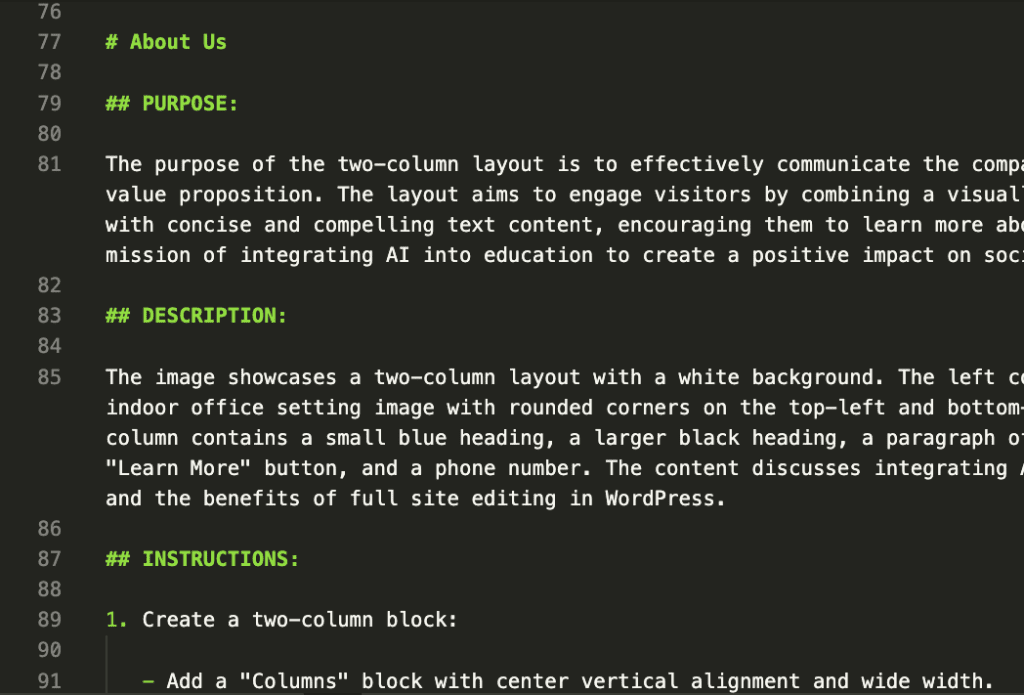
6. The AI will hit you back with the purpose, detailed description, and step-by-step instructions. It’s like magic!
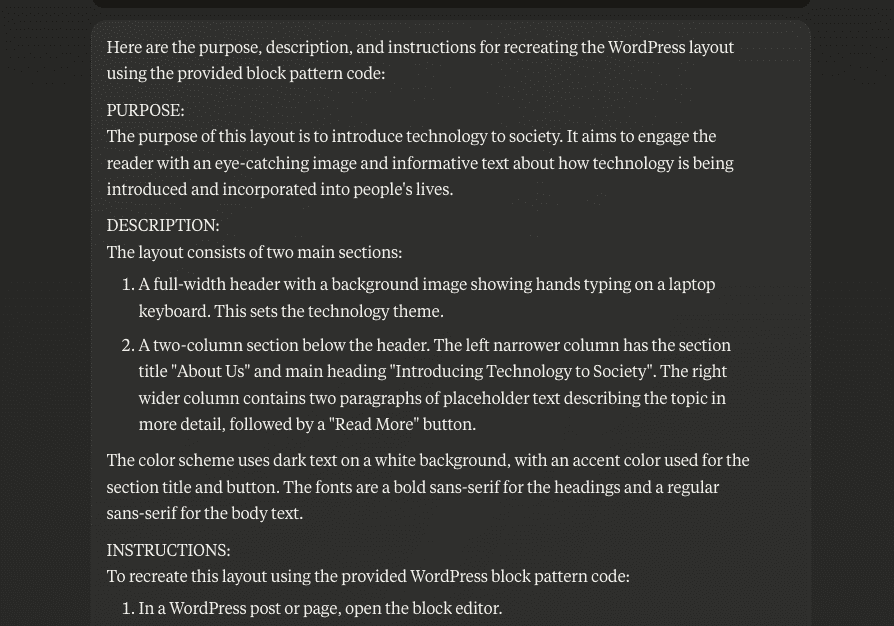
7. All that’s left is to copy the AI-generated content and paste it into your training docs. Here’s the format to follow:
# {Title of the block pattern}

## PURPOSE
{insert the purpose here}

## DESCRIPTION:
{insert the description here}

## INSTRUCTIONS:
{insert the instructions here}

## BLOCK PATTERN
{insert the block pattern codes here}
Rinse and repeat until you’ve got a training docs packed with 15 to 20 block patterns that you’re totally vibing with.
Pro tip: save the file in markdown format. It’ll make it a breeze for the AI to read.
Personally, I’m all about using Obsidian to compile the training docs. It’s like the express lane for this stuff. But if you’re more of a Notion fan, go for it! Just make sure to export it as a markdown file when you’re done.
Finally, give it a test run and see if it works!
Word of Advice: The AI is Only as Good as Your Training Docs
Here’s the deal: if your training docs are full of junk, the AI is gonna spit out junk right back at you.
It’s like the old saying, “garbage in, garbage out.” So, make sure you’re only including the crème de la crème of block patterns. We’re talking top-notch, cream of the crop, best of the best. If you stick to quality, the AI will deliver quality results. But if you skimp on the good stuff, well… you might end up with some less-than-stellar outputs.
.
.
.
Common pitfalls in crafting the training docs
Alright, let’s dive into some of the common pitfalls you might encounter when creating training.
Pitfall #1: Including too many block patterns in training docs
First up, let’s talk about the temptation to stuff your training docs with every block pattern under the sun. I get it, you want to give your AI a comprehensive education, and you might think that more patterns equal better performance.
But hold your horses!
There’s a catch.
You see, Claude AI, as powerful as it is, has a context window limitation of 200,000 tokens. That might sound like a lot, but when you start piling on the block patterns, those tokens get gobbled up faster than a plate of cookies at a kid’s birthday party. And when your training docs are too long, there’s less room for the AI to generate new content. It’s like trying to pour a gallon of milk into a pint-sized glass – it just won’t fit!

So, how do you find the right balance?
It’s all about quality over quantity.
Instead of throwing every pattern you can find into the mix, be selective. Choose a diverse range of patterns that cover the essential layout types you need. Aim for a target range of block patterns that won’t overload the AI’s context window. And don’t be afraid to experiment!
Find that sweet spot that works best for your needs.
But wait, there’s more!
Pitfall #2: Using overly complex block patterns
Another pitfall to watch out for is using overly complex block patterns.
I know, I know, it’s tempting to showcase your mad skills with advanced layout techniques. You might think that complexity will lead to more creative AI outputs. But trust me, it’s a trap!
Complex block patterns are like token-hungry monsters.
They’ll devour those precious tokens, leaving less space for the AI to generate content. Plus, overly complicated patterns can lead to confusion and inconsistency in the AI’s outputs. It’s like trying to teach a toddler calculus – it’s just not gonna stick.

The key here is to keep it simple and focused.
Clarity and simplicity are your friends when it comes to block patterns.
The AI can learn effectively from straightforward examples that demonstrate key layout concepts. Remember, the goal of training docs is to teach the AI the fundamentals of block patterns, not to overwhelm it with intricate designs.
When selecting block patterns, choose ones that:
- Clearly illustrate the layout concepts you want the AI to learn.
- Opt for patterns with clean, well-structured code.
- Avoid patterns with excessive customization or complex nested structures.
Think of it like building a solid foundation – start with the basics and let the AI build upon that knowledge.
And here’s the kicker: simple, focused block patterns can lead to impressive AI results. Don’t underestimate the power of simplicity in AI training. Trust in the AI’s ability to learn and generalize from basic examples. You might be surprised at the creative solutions it comes up with!
As you embark on this journey of creating training docs, remember that it’s an iterative process.
Your training docs are a work in progress, and that’s okay!
Embrace the importance of continuous learning and adaptation. Experiment, learn from the AI’s outputs, and refine your approach over time. It’s all part of the exciting adventure of AI-assisted web design.
.
.
.
Wrapping Up the AI Adventure
Whew! What a journey we’ve been on, exploring the incredible potential of AI in WordPress web design.
We’ve seen how Claude 3 Opus can take a simple screenshot and turn it into a fully functional block pattern, making our design dreams a reality. We’ve discovered the secret sauce behind this AI magic – the training docs that teach our AI sidekick everything it needs to know.
And we’ve navigated the common pitfalls, learning how to create effective training docs that bring out the best in our AI partner.
But here’s the thing – this is just the beginning of the adventure.
The world of AI-assisted web design is constantly evolving, and there’s so much more to discover. As you dive deeper into this exciting frontier, remember to embrace the spirit of experimentation and continuous learning.
Don’t be afraid to try new things, to push the boundaries of what’s possible with AI and WordPress.
And most importantly, have fun with it!
Building websites with AI is like having a super-powered sidekick by your side. It’s a wild ride, but it’s also an incredible opportunity to unleash your creativity and bring your wildest design ideas to life.
So, what are you waiting for?
Grab your training docs, fire up Claude 3 Opus, and let’s see what kind of web design magic we can create together!
Who knows – you might just revolutionize the way we build websites, one AI-powered block pattern at a time.
Happy building, and may the AI force be with you!

Leave a Reply